Drawing a Monstera leaf can be a fun and rewarding activity. This step-by-step guide makes it simple for everyone.
Monstera leaves are known for their unique shapes and intricate patterns. They are a favorite among artists and plant lovers. Drawing them can help improve your skills and creativity. In this guide, we will break down the process into easy steps.
Whether you are a beginner or an experienced artist, you will find this tutorial helpful. Grab your pencils, paper, and let’s start drawing a beautiful Monstera leaf!
Materials Needed
To create a beautiful Monstera leaf drawing, you need the right materials. These tools will help you achieve the best results. Here are the essentials you need:
Pencils And Erasers
Start with a set of quality pencils. A range of hardness, from H to B, will give you the flexibility to create light and dark lines. HB pencils are great for initial sketches, while 2B and 4B pencils are excellent for shading and adding depth.
Next, an eraser is crucial. A kneaded eraser works well for lifting graphite without damaging the paper. It’s also great for creating highlights. A standard rubber eraser is useful for more precise corrections.
Paper Selection
The type of paper you choose affects your drawing quality. Smooth paper is ideal for detailed work, while textured paper adds a unique touch to your drawing. Here’s a quick comparison:
| Paper Type | Characteristics |
|---|---|
| Smooth Paper | Best for fine details. Allows even shading. |
| Textured Paper | Gives a distinctive look. Suitable for bold strokes. |
Additional Tools
Besides pencils and paper, a few other tools can enhance your drawing:
- Blending Stumps: Blend pencil strokes smoothly.
- Ruler: Keep lines straight and even.
- Sharpener: Maintain a fine pencil point.
- Fixative Spray: Protect your finished drawing.
These tools help you achieve a polished and professional look.
Basic Leaf Shape
Creating a Monstera leaf drawing can be a fun and rewarding experience. Start by understanding the basic leaf shape. This step sets the foundation for the entire drawing. Follow these easy steps to draw a stunning Monstera leaf.
Outline The Contour
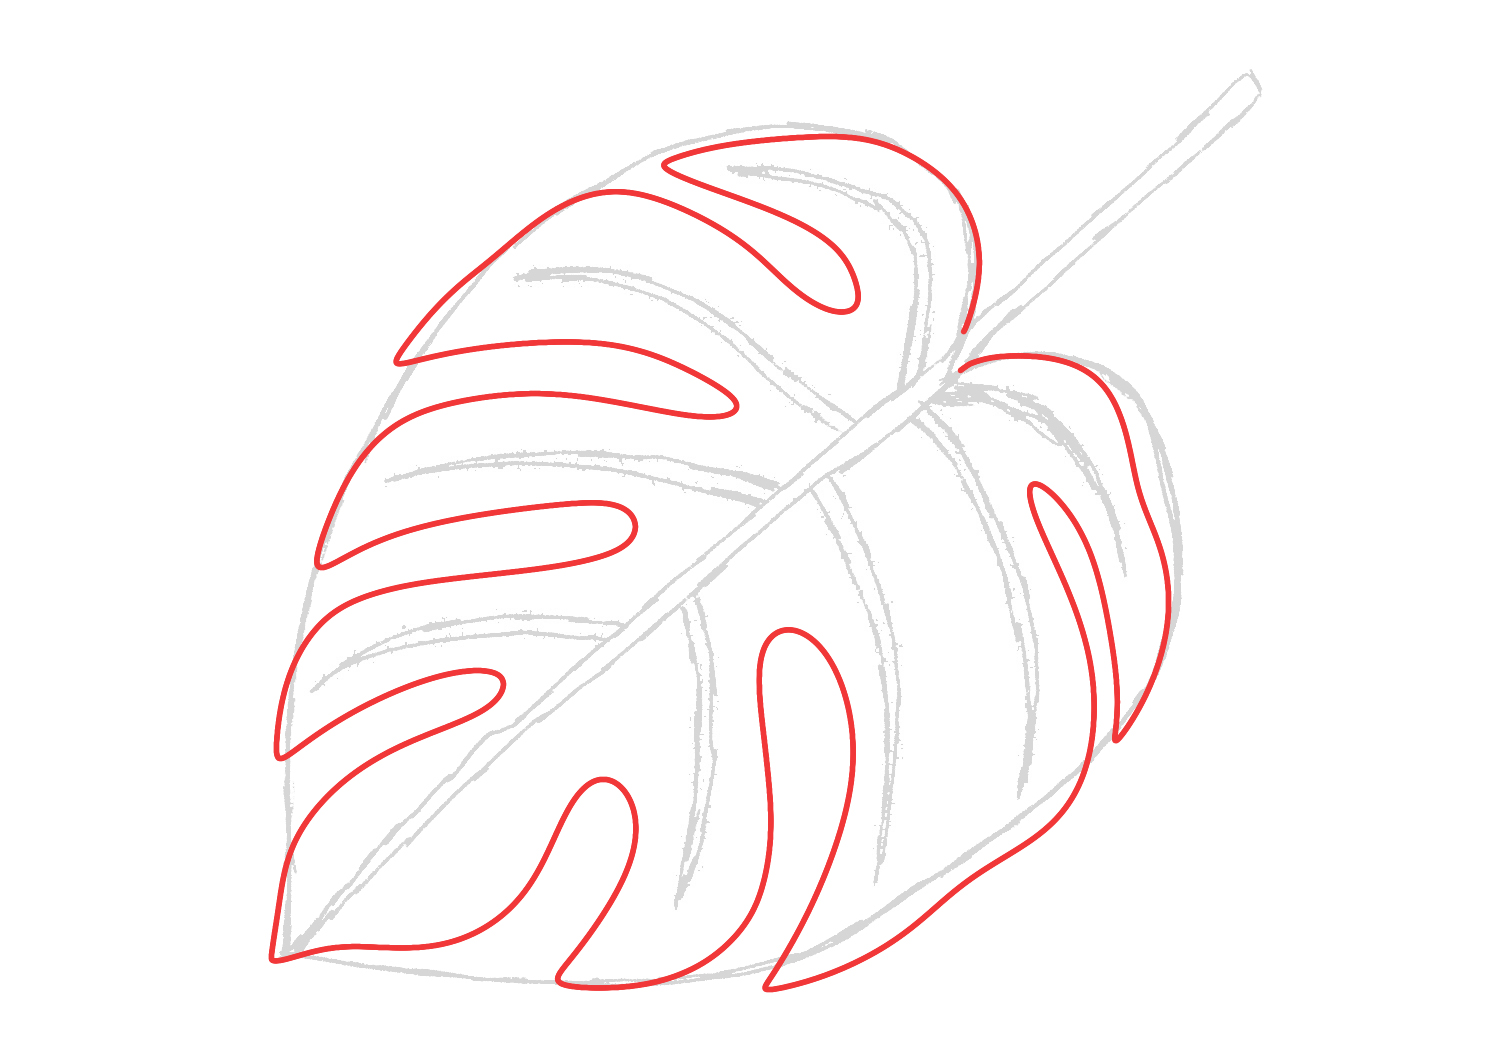
Begin by drawing a large, oval shape. This will be the outline of the leaf. Make sure the oval is slightly elongated. This mimics the natural shape of a Monstera leaf. Then, add a slight curve to one side. This gives the leaf a more realistic look. Remember, the contour doesn’t need to be perfect. Leaves in nature have imperfections.
Next, draw the characteristic splits and holes. These features are unique to Monstera leaves. Start with a few simple cuts along the edges. Make them curved and uneven. Then, add some oval holes within the leaf. Vary their sizes for a more natural effect. This step adds the distinctive character to your Monstera leaf.
Define The Central Vein
Now, it’s time to define the central vein. Draw a line from the top of the leaf to the base. This line represents the main vein. Make it slightly curved to follow the shape of the leaf. The central vein is the backbone of the leaf. It gives structure and form.
Next, draw smaller veins branching out from the central vein. These veins should extend towards the edges of the leaf. Make them curved and slightly uneven. This adds realism to your drawing. The veins provide the leaf with a lifelike texture and depth. They make your Monstera leaf look more three-dimensional.
Adding Leaf Lobes
Creating realistic Monstera leaves involves careful attention to detail. Adding leaf lobes brings the drawing to life. Lobes give the leaf its characteristic look. Follow these steps to add lobes to your Monstera leaf drawing.
Sketch Large Lobes
Start by sketching the large lobes. These are the main sections of the leaf. First, outline the basic shape of the leaf. Then, draw the central vein. This vein is the backbone of the leaf.
Next, draw the large lobes on either side of the central vein. Make sure the lobes are evenly spaced. Each lobe should be roughly the same size. Use smooth, curved lines to create a natural look.
Here’s a simple table to help you visualize the steps:
| Step | Description |
|---|---|
| 1 | Outline the basic shape of the leaf. |
| 2 | Draw the central vein. |
| 3 | Sketch large lobes on both sides of the vein. |
Create Smaller Lobes
After sketching the large lobes, add smaller lobes. These add more detail and complexity. Draw these smaller lobes between the large lobes. They should be slightly smaller and vary in size.
Use the same smooth, curved lines. Keep the overall symmetry of the leaf in mind. Each small lobe should complement the larger lobes.
To summarize:
- Draw smaller lobes between the large lobes.
- Ensure the smaller lobes are slightly varied in size.
- Maintain the symmetry of the leaf.
By following these steps, you can create a detailed and realistic Monstera leaf drawing. Focus on the balance and proportion of each lobe. Happy drawing!
Drawing Leaf Veins
Drawing leaf veins on a Monstera leaf can seem tricky. But with simple steps, you can make your leaf look natural and detailed. This guide will help you draw both the main and secondary veins on your Monstera leaf drawing.
Main Veins
Start with the main veins. These are the thickest and most prominent lines on the leaf.
- Identify the central vein that runs through the middle of the leaf.
- Use a soft pencil to draw this central vein. Make sure it is slightly curved, following the leaf’s shape.
- From the central vein, draw a few main veins that branch out towards the edges. These should be evenly spaced.
- Ensure these veins are thicker at the base and gradually thin out towards the edges.
Secondary Veins
Next, add the secondary veins. These are smaller and help create a more realistic look.
- From each main vein, draw smaller veins branching out.
- These secondary veins should be thinner and lighter.
- They can be more random and do not need to be evenly spaced.
- Make sure they follow the natural curve of the main veins.
Take your time with these veins. They add texture and detail to your drawing.
Detailing The Edges
Detailing the edges of your Monstera leaf drawing can make a big difference. It brings your drawing to life and adds a touch of realism. Whether you prefer smooth or serrated edges, attention to detail is key. Follow these steps to make your Monstera leaf look natural and dynamic.
Smooth Edges
Start by refining the outline of your leaf. Use a sharp pencil or fine-tipped pen. Draw gentle curves along the edge. Avoid making harsh or jagged lines. Smooth edges give the leaf a soft, delicate appearance. This method works well for younger Monstera leaves. They often have fewer cuts and holes.
Add Serrations
Older Monstera leaves often have serrated edges. To create these, draw small, triangular cuts along the leaf’s edge. Space them evenly for a natural look. Vary the size of the serrations for realism. Some cuts should be deeper, while others are shallow. This creates a textured, mature leaf.
Combine smooth and serrated edges for a dynamic look. This technique adds depth and interest to your drawing. Practice both methods to find your style.
Shading Techniques
Mastering shading techniques can bring your Monstera leaf drawing to life. Shading adds depth, dimension, and a touch of realism. It helps to make your artwork more engaging. Let’s explore some effective shading techniques.
Light Source Consideration
First, identify your light source. This is crucial. It determines where the shadows will fall. Imagine the sun or a lamp shining on your leaf. Visualize which parts are hit by light. These areas will be brighter. The opposite side will be darker. This contrast creates depth.
Start by lightly sketching the light source direction. This will guide your shading. Keep checking the light source as you shade. This consistency ensures a realistic look.
Gradient Shading
Gradient shading is essential for realistic drawings. It involves transitioning from light to dark gradually. This technique adds a smooth texture. Begin with the lightest areas. Use a soft pencil. Apply light pressure.
Gradually, increase pressure as you move towards the darker areas. This creates a gradient effect. Blend the shades well. You can use a blending tool or your finger. Ensure there are no harsh lines. This makes the shading look natural.
Practice gradient shading on a separate paper first. This helps in understanding pressure control. Once confident, apply it to your Monstera leaf. Observe the leaf closely. Notice the subtle gradients in real life. Replicate them in your drawing.
Adding Texture
Adding texture to your Monstera leaf drawing can bring it to life. It gives depth and realism to your artwork. This section will guide you through creating surface patterns and vein textures.
Surface Patterns
Surface patterns are key to a realistic Monstera leaf. Start by observing a real Monstera leaf. Notice the small speckles and tiny dots on its surface. Use a light pencil to draw these patterns. Randomly scatter them across the leaf. Keep the dots close together in some areas. Spread them out in others.
Also, add tiny lines following the shape of the leaf. This helps create a natural look. Use short, quick strokes. Vary their length and direction. This mimics the natural imperfections of the leaf.
Vein Texture
Vein texture is another important aspect. Begin with the main vein running down the center. Draw it with a firm, steady hand. Then, add the smaller veins branching out from it. These should curve slightly. They should follow the flow of the leaf.
Make the veins thicker near the center. Gradually thin them out as they extend. This adds a sense of depth. Lightly shade around the veins. This creates a three-dimensional effect. Use a blending tool to soften the shading.
Finally, add small details like tiny bumps and ridges along the veins. These little touches make the leaf look more realistic. Take your time with this step.

Final Touches
Completing your Monstera leaf drawing involves adding the final touches. These steps help your artwork shine. They ensure your leaf looks realistic and detailed. Let’s explore the important aspects of finalizing your drawing.
Enhancing Details
Begin by refining the leaf’s veins. Use a fine-tipped pen or pencil for this. Draw thin lines within the main veins. This adds depth and texture.
Next, shade the leaf to create shadows and highlights. Use a softer pencil or shading tool. Focus on the areas where light naturally falls. This will make your leaf appear three-dimensional.
Check the edges of the leaf. Smooth any rough or uneven lines. This will make your drawing look clean and polished.
Fixing Mistakes
Review your drawing for any errors. Common mistakes include uneven veins or incorrect shading. Gently erase and correct these areas.
If your lines are too dark, use a kneaded eraser. Lightly dab it on the dark areas to lift some graphite. This technique softens harsh lines.
Check the proportions of your leaf. Ensure the size and shape are consistent. Adjust any parts that look out of place.
Finally, step back and view your drawing from a distance. This helps you spot any missed details. Make the necessary adjustments for a well-balanced piece.
Frequently Asked Questions
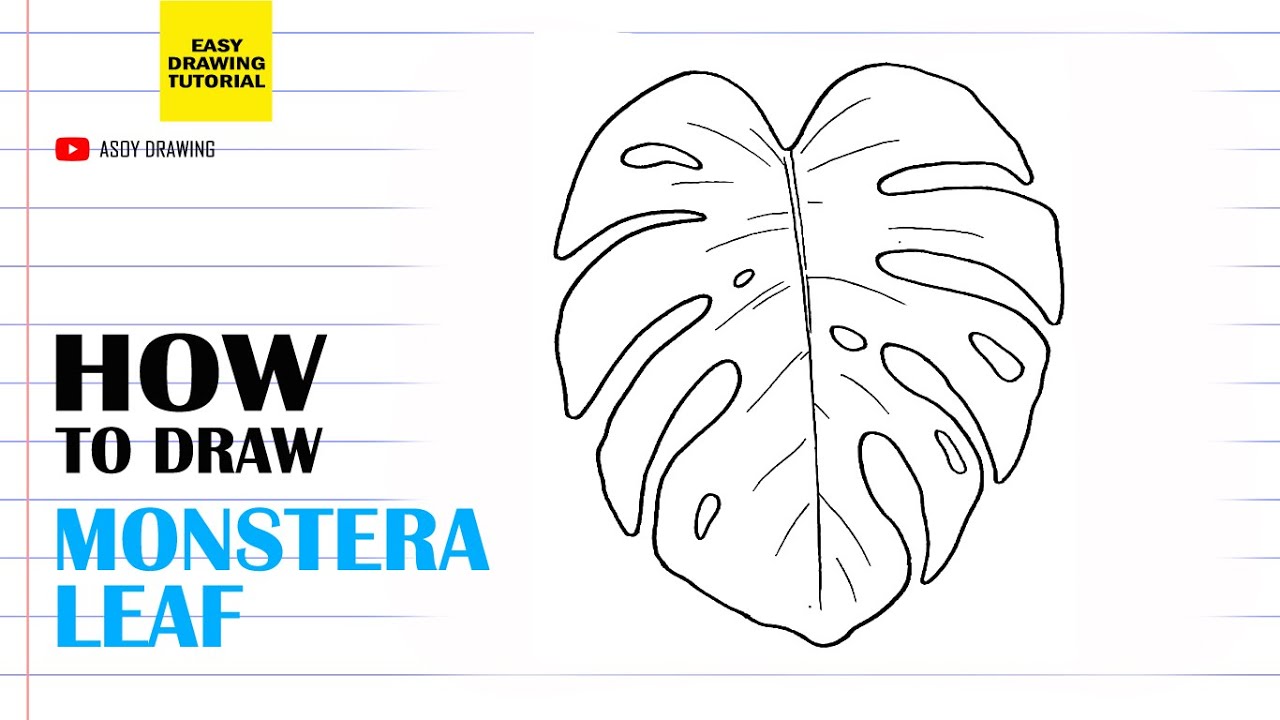
How Do You Draw A Monstera Leaf?
To draw a Monstera leaf, start with a simple outline. Add the characteristic splits and holes. Finally, add details and shading.
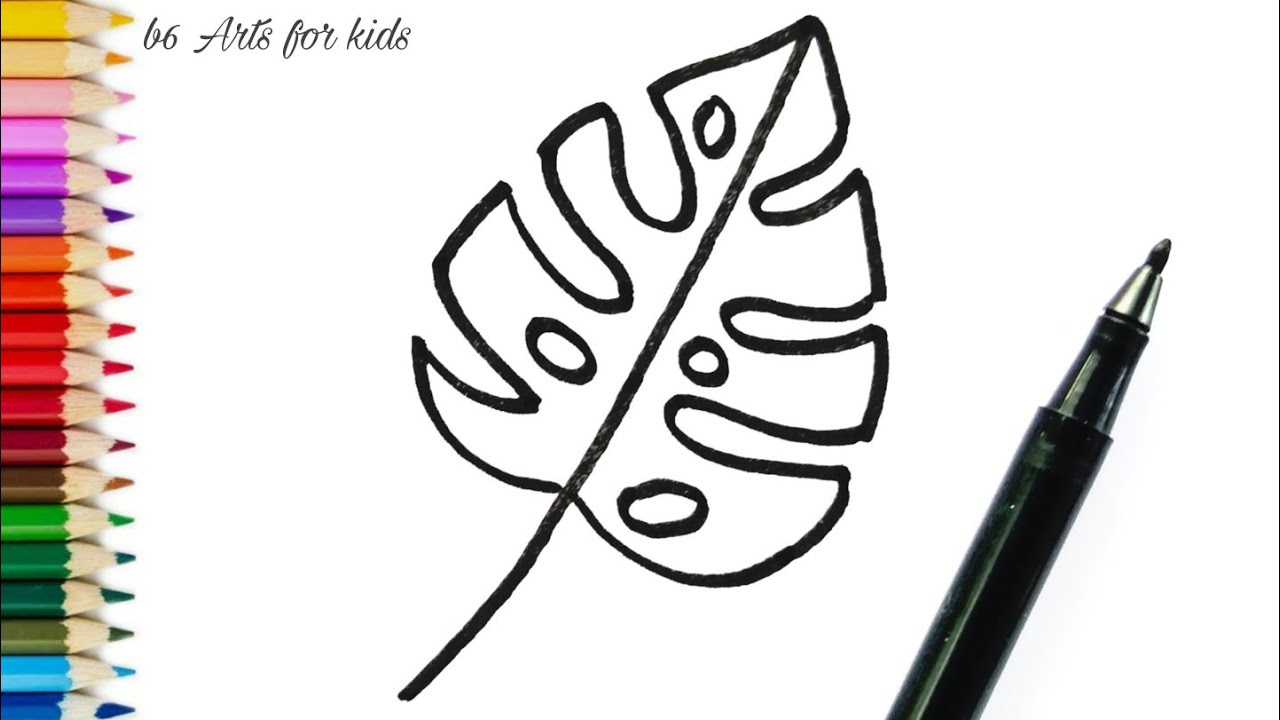
What Tools Do I Need For Monstera Leaf Drawing?
You need paper, a pencil, an eraser, and coloring tools. Optional tools include fine liners and shading pencils.
How Long Does It Take To Draw?
The drawing time varies. It can take 30 minutes to an hour, depending on your skill level.
Can Beginners Draw A Monstera Leaf?
Yes, beginners can draw a Monstera leaf. Start with simple shapes and gradually add details.
Conclusion
Drawing a Monstera leaf can be fun and rewarding. With each step, your confidence grows. Practice makes perfect, so keep drawing. Every effort leads to improvement. Soon, you’ll create stunning Monstera leaf art. Share your drawings with friends. They will appreciate your talent.
Enjoy the process and happy drawing!
Leave a Reply